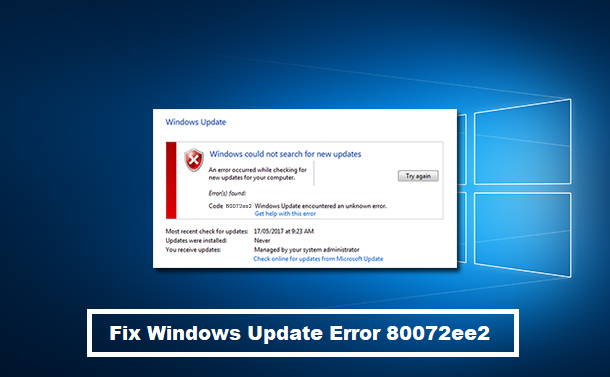
Windows update error 80072ee2 occurs when the system files are corrupt or the updates are stuck. Also, a corrupt registry, faulty computer settings, or a poor internet connection, may all lead to this error.
Once you encounter this error on the LED display of your PC, all the updates will stop immediately.
Reliable Hacks to Fix Windows Update Error 80072ee2
Before proceeding to the solutions, ensure that you have a good internet connection. Also, make sure, you have correctly entered the date and time.
Once you have assured that, check out the fixes given below.
Solution 1: Modify the Registry

The best way to remove this error code 80072ee2 is to modify the registry and delete some keys. To implement the task, follow the steps given below carefully.
Step 1
At first, press and hold the Windows and R keys together to launch the Run dialog box. Inside the run box, type’ services.
msc’. Then, hit the Enter key.
This will lead to the Service window.
Step 2
Here, scroll down and locate the Windows Update option. Then, right-click on the Service and choose Stop from the menu.
Step 3
Again, launch a Run dialog box. Type ‘ regedit’ in the Run box and hit the Enter key. This will open the Registry Editor.
Within the Registry Editor, move to the given path,
‘HKEY_LOCAL_MACHINE\SOFTWARE\Policies\Microsoft\Windows\WindowsUpdate’
Step 4
On the right of the window, search for WUServer and WUStatusServer. Once found, then you have to right-click on each of these keys and after that, choose Delete from the available options.
Next, go to the Service Console and ensure that the Windows Update service is still running.
Reboot your device and then check the error status. Unfortunately, if the error still occurs, then try the next remedy.
Solution 2: Run the Windows Update Troubleshooter

The Windows inbuilt troubleshooter checks the settings of your computer and then make the necessary changes to fix the problem.
However, before applying this fix, you need to make sure that you have logged in as an administrator. Now, follow these directions.
- First, press and hold the Windows and S keys together to open the search bar. After that, enter ‘troubleshoot’ in the search field and then, click on the first search result.
- Within the Troubleshoot menu, navigate to the bottom and choose ‘Windows Update’. Thereafter, select the ‘Run the troubleshooter’ option.
- In case, you are a Windows 7 user you can manually move to the Troubleshooter from the Control Panel.
- Now, the troubleshooting process will begin. During the process, multiple options will appear on the screen. Check the box beside ‘Try troubleshooting as an administrator’.
- Once you have successfully attempted the above steps, reboot your computer and see if the error has been resolved or not.
Solution 3: Delete the Software Distribution Folder

According to some users after deleting the Software Distribution folder, they quickly overcame the situation. To apply this remedy, here are the steps that should be followed.
Step 1
At first, enter ‘command prompt’ in the search field and press the Enter key. Afterward, right-click on Command Prompt and choose ‘Run as administrator’ from the menu.
Now, enter the commands given below. Don’t forget to hit the Enter key after typing each.
- net stop cryptSvc
- net stop wuauserv
- net stop msiserver
- net stop bits
Step 2
Thereafter, go to the Windows Update directory. Here, you have to delete all the updated files. Open the File Explorer and then move to C:\Windows\SoftwareDistribution.
Within the Software Distribution folder, delete everything.
[Note- You may also rename the software distribution folder].
Step 3
Next, you should open an elevated command prompt and type the following commands one by one and hit the Enter button after each.
- net start cryptSvc
- net start wuauserv
- net start msiserver
- net start bits
Step 4
In case, the issue is related to the network settings, then type this command within the elevated command prompt.
‘netsh int tcp set global autotuninglevel = disabled’
Finally, reboot your computer and try to complete the pending update.
Solution 4: Use the SFC and DISM Tool

To repair the corrupt system files, you are suggested to run the inbuilt SFC tool. To do so, press and hold the Windows and X keys simultaneously in order to open the main menu.
Select Command Prompt. After that, right-click on it and run the Command Prompt as administrator.
Within the Command Prompt, type ‘sfc/scanow’ and hit Enter.
Now, the scanning will begin. It might take 15 to 20 minutes to finish scanning your system. So, keep calm. When finished, check if the error still persists or not.
If it does, then, again open the Command Prompt as administrator. After that, enter, ‘DISM/online/cleanup-image/restorehealth’ in the command field. Wait for the completion of the procedure.
When finished, restart your computer.
Solution 5: Run the CHKDSK

Still, dealing with the windows update error 80072ee2? Then it is recommended to run the CHKDSK tool.
Now, in order to apply this solution, first, enter ‘command prompt’ in the search field. Press the Enter key.
Then, right-click on the first search result and select Run as Administrator. Afterward, enter ‘chkdsk/r’ in the command field. This command will detect errors and fix them.
Reboot your machine and after that, the error code will hopefully not appear on the display.


