
While trying to open the Nvidia control panel on your Windows 10 PC, you may at times notice that the Nvidia Control Panel won’t open. As a result, you’ll be unable to use it on your device.
This error comes up if the Nvidia display driver has not been updated for a long time. Apart from that, corrupted drivers, third-party security software or Windows firewall, or if the Fast Boot feature is enabled on your device, then that too can lead to this error.
How to Fix NVIDIA Control Panel Won’t Open on Windows 10
In this segment, you will get to know all the useful fixes to get rid of the situation when the Nvidia control panel won’t open on Windows 10. One of the following fixes should help you to overcome this problem. Therefore, read and implement them exactly as mentioned below.
Fix 1 # End NVIDIA Display Container Process
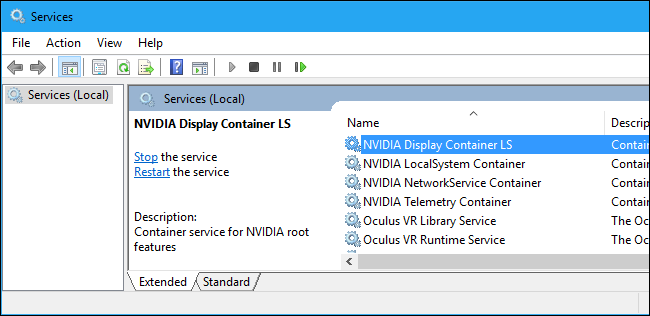
One of the easy ways in which you can get rid of the “Nvidia control panel won’t open” issue on the device is to end the Nvidia Display Container process. To do that,
- Press the Ctrl + Shift + Esc buttons together to launch the Task Manager window.
- When you are in the Task Manager window, go to the Processes tab and find the Nvidia Display Container process, right-click on it.
- Afterward, select the End Task option from the menu list.
- After doing this, restart your Windows 10 system and then try to open the Nvidia Control Panel.
Fix 2 # Restart the Nvidia Display Driver Service
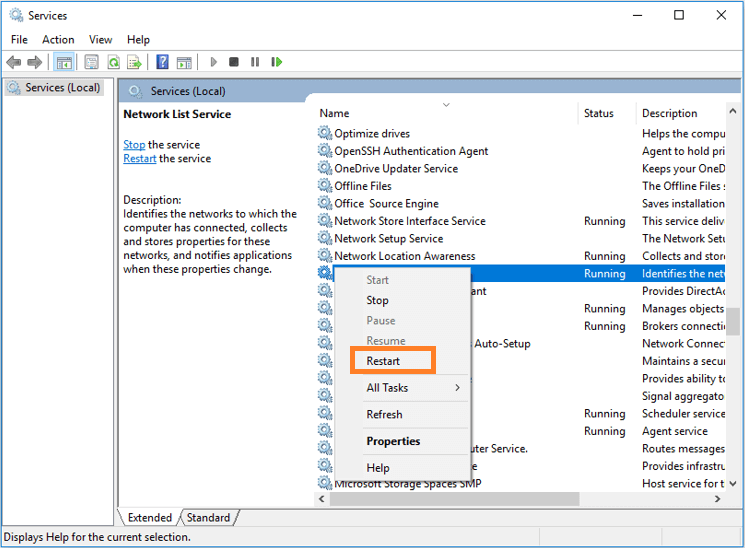
If the NVIDIA driver service has stopped running on your device, then you may encounter this problem on it. Therefore, you should restart the service by following these steps:
- Press the Windows Home button and then select Run.
- In the Run box, type services.msc and then hit the Enter key or click on the OK option.
- When the Services window opens, locate the NVIDIA Display Driver service, right-click on it and then select the Restart option.
- Again right-click on it and then choose Properties.
- From the Properties window, set the Startup type to Automatic from the drop-down menu list and then click on the Apply option followed by the OK button.
Fix 3 # Disable the Fast Boot Feature

Every Windows 10 system has a fast boot feature. But sometimes, this feature can also cause the Nvidia control panel to not open. So, you can try disabling it and see if that ends the issue.
- Press the Win + S keys to launch the Search box.
- Type Power options and then press the Enter key.
- When you are in the Power Options window, click on the Choose what the power button does button on the left panel.
- On the right, click on the ‘Change settings that are currently unavailable’ option.
- Under the Shutdown settings section, unmark the Turn on fast startup (recommended) button and then click on the Save changes button.
Fix 4 # Install the Latest Version of the NVIDIA Display Driver

An older version of the Nvidia Display driver can cause the “NVIDIA control panel won’t open” issue on the system. Therefore, you should update the driver immediately. To update the driver, follow these steps:
- Hit the Windows Home key and then choose Device Manager.
- From the Device Manager window, locate the Display Adapters section and select it to expand.
- Find the NVIDIA driver, right-click on it and then select the Update Software driver option to begin the update process.
- Once the update process completes, restart your computer and then check if the problem is resolved or not.
Fix 5 # Open the Application directly from the Installation Directory

- First, navigate to the C: Program FilesNVIDIA CorporationControl Panel Client folder.
- Find nvcplui.exe and then run it.
- Now check if it solves the issue or not.
Fix 6 # Install the Latest Version of the Operating System

If you are using an older version of the Operating System then you can come across the “Nvidia control panel won’t open” issue on a Windows 10 device. Therefore, it is important to keep the system up to date. Perform the following:
- Press the Start button + I key together to launch the Settings window.
- From the Settings window, double-click on the Update & Security section.
- In the window that opens, go to the Update tab and then click on the Check for updates option for the available updates.
- If an update is present, then you will get to see an option Update, click on it.
- After completing the update, the device will automatically restart.
Fix 7# Turn Off Windows Firewall

If the Windows Firewall is enabled, then also you can encounter this error on a Windows 10 computer. So, you should disable it by following these directions:
- Launch the Control Panel window and double-click on the Windows Firewall section.
- When you are in the Windows Firewall window, click on the Turn Windows Firewall On and Off option on the left panel.
- Tick the box next to the Turn Off Windows Firewall option from both Private Network Settings and Public Network Settings sections. Then click on the Save Changes option.
- After doing this, reboot the PC and then check if it opens the NVIDIA Control Panel window without any problem.
Fix 8 # Remove the Security Software

Security software is often the reason behind the ‘NVIDIA control panel won’t open’ issue. Therefore, you need to remove it at the earliest. Here’s how to do that:
- Hit the Windows button and then click on the Settings icon.
- Go to the Apps section and then select the Apps & Features tab.
- From that tab, scroll down the page and locate the security software, select it and then click on the Uninstall option.
- Once it is uninstalled, try to open the NVIDIA Control Panel.
Fix 9 # Reinstall the NVIDIA Display Driver

The “Nvidia control panel won’t open” problem can be caused due to a corrupted or faulty NVIDIA driver. So, you should remove it and then reinstall it.
- Open the Device Manager window and locate the Display Adapters section, select it to expand.
- Right-click on the NVIDIA Display driver and then choose the Uninstall device button.
- After uninstalling the driver, restart the PC and then try to reinstall it.
- To install it, visit the NVIDIA official page and download the latest version of the driver.
- After downloading the driver, install it properly.
- Once the installation process is complete, reboot your Windows 10 device and then check if the problem is gone or not.
Fix 10 # Using the Registry Editor

- Press the Win key + R button to open the Run box.
- Type regedit and then press the Enter key or select the OK button.
- From the Registry Editor window, navigate to: HKEY_CLASSES_ROOT\Directory\Background\ContextMenuHandler.
- Find and right-click on the NvCplDesktopContext and then choose the Delete option.
- After that, right-click on Shell and select New > Key. Then set the ‘name of the new key is’ to NVIDIA Control Panel.
- Right-click on NVIDIA Control Panel and then choose New > Key. After that, set the name of the new key is to Command.
- Double-click on Command and then set the Value data to C:\Windows\System32\nvcplui.exe. Thereafter, click on the OK option to save the changes.
- Then reboot the device and check if the issue is solved or not.


